22XX Power Valve Mods
Getting the Most Out of Your 22xx
These mods work specifically with the Crosman 2240, 2250, and 2260. Many of the ideas presented here also apply in one shape or form to other airguns as well. If you combine the following mods with a 24" 2260 barrel, you should be able to achieve high 700's to low 800's depending on pellet weight and temperature. Many of these mods will just waste gas with a shorter barrel. If you wish to have a shorter barrel, change out the valve and hammer springs and install a power adjuster.
Taking the Valve Apart
Sometimes these valves can be rough taking apart, as Crosman Loctites the valve shut. You'll need two pairs of vice grips and some rubber from a bike innertube. Pad the jaws of the vice grips with the rubber and clamp both pairs on the valve. Twist counterclockwise and the valve should open.
Increasing Efficiency
Installing lighter valve and hammer springs reduces stress on the airgun and lightens the trigger pull as well. Get an assortment of compression springs from the hardware store and find one that is lighter and slightly longer than the stock valve and hammer springs:
You'll want to combine this mod with the power adjuster mod.
The Quest for Better Flow
To increase power, you'll want to smooth out the airflow. The first way to do so is to take your valve body:![]()
and clamp it in a vice to change the gas port angle to something shallower than 90 degrees:
Be careful not to go too deep, or you will mess up the valve seat, causing uncontrollable gas leaks.
Another way to improve flow, that can also increase volume is to modify the valve stem. Here is a modified valve stem with a stock one below it:
Study carefully the differences. Note how the top one has part of the stem shaped. This can improve flow as the CO2 rushes toward the barrel. Do not remove too much material, and go slowly to prevent melting the seal material. You can also carefully round off the brass to improve flow.
If you intend to use CO2 cartriges or a short barrel, leave the piercing pin on. If you are using bulk fill and want to increase the valve volume, remove the piercing pin with a strong pair of wire cutters, or remove as much as I did with a Dremel. If you choose to use a Dremel, please go slowly as you can melt the seal material. If you want to use CO2 cartriges but also want to increase valve volume, you can grind the piercing pin flat on the sides. Just be careful not to remove too much material, weakening the pin.
Increasing Volume
As CO2 is at a relative constant pressure, the only way to really get more power is to increase the amount of gas pushing the pellet out of the barrel. You will also want to use a longer barrel to give the gas more time to expend its energy on the pellet. If you have installed a lighter spring and removed some of the valve stem material, you have already increased your valve volume by a bit. One of the best ways to add volume to your valve is to modify the end of your valve.
Before modifying the valve end, be sure to remove the rubber o-ring to prevent heat damage. Clamp the valve end in a vice and remove some of the threads with a Dremel. When you are finished, it should look something like this: When you reassemble your valve, you will definitely want to use some sort of thread adhesive to make sure the valve does not open.
The next thing you will want to do to the valve end is to drill out some of the excess material. Clamp the valve end in a drill press and bore it out another 1/4 inch or so. It should look something like the one on the left: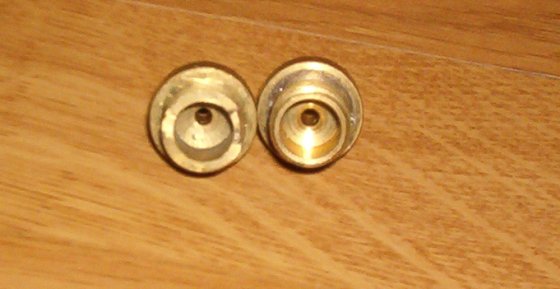
Rear Valve Spring
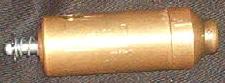
I came up with this mod back in August of 2004. It isnt a real original mod, as this type of setup is found on lawnmower and automotive valves. This valve mod gave me more power than anyother mod I did before. It also was the biggest gas hog and pain in the rear to get right. Before you try it, you'll want to use some sort of bulk fill system (use paintball CO2 tanks instead of CO2 cartriges). The one I used was a fake CO2 adaptor:
Once you have a bulk CO2 system in place, you will want to shape the valve stem like the one seen in this picture:

Note the slot cut into the back of the valve stem. This is to hold the e-clip which functions as the spring retainer. You'll also want to drill a bit into the valve body to better accomodate the rear spring.
To reassemble, insert the valve stem, loctite the valve shut, slip a spring over the stem, and install the e-clip. Your reassembled valve will look like this:
To keep the e-clip secure, you'll want to apply an epoxy adhesive. Allow the recommended time to set. When you reassemble the airgun, be sure to dry fire it several times with no CO2 pressure. Disassemble and make sure everything is staying together. If so, reassemble the gun and you'll be amazed at what it will do over a chrony.
| Home |
| Blowguns |
| Crosman Mods |
| Forum |
| Homemade Airguns |
| Hunting with Airguns |
| Links |
| Photo Gallery |
| Airguns for Sale |
